
I’ll never forget my grandmother, Elsie. Every autumn, her kitchen would fill with the warm, comforting scent of cinnamon and baked apples. She’d be elbow-deep in flour, humming a little tune, crafting her famous Apple Bars. They weren’t fancy, mind you. Just simple, honest baking. But those bars? They were pure magic. They were fall personified. And I’m thrilled to share her secret (slightly adapted, of course!) with you. These aren’t your average apple dessert; they’re a buttery, crumbly masterpiece bursting with juicy, spiced apples. Get ready to fall in love with these homemade treats!
Why You’ll Love These Apple Bars
Let’s be honest, who doesn’t love apples? And combining them with a buttery, crumbly crust? It’s a match made in dessert heaven. Here’s what makes these Apple Bars so special:
- Seriously Delicious Apple Filling: We’re not just throwing chopped apples into a pan. This filling is gently spiced with cinnamon, nutmeg, and a touch of lemon juice. It’s a flavor explosion!
- Buttery, Crumbly Crust: The base and topping are the same buttery shortbread crust – trust me, it’s addictive. It’s perfectly crumbly, not too dense, and holds up beautifully to the juicy apple filling.
- Easy to Make: Don’t let “homemade” intimidate you. This recipe is surprisingly straightforward, even for beginner bakers.
- Perfect for Sharing (or Not!): These bars are fantastic for potlucks, fall gatherings, or simply indulging in a cozy afternoon treat.
- A Taste of Nostalgia: Just like Elsie’s, these bars evoke feelings of warmth, comfort, and happy memories.
Ingredients You’ll Need
For the Shortbread Crust (Base & Topping):
- 1 ½ cups (192g) all-purpose flour
- ½ cup (113g) cold, unsalted butter, cubed
- ¼ cup (50g) granulated sugar
- ½ teaspoon salt
For the Apple Filling:
- 6 medium apples (Granny Smith, Honeycrisp, or a mix work well), peeled, cored, and chopped into ½-inch pieces
- ½ cup (100g) granulated sugar
- 2 tablespoons all-purpose flour
- 1 teaspoon ground cinnamon
- ¼ teaspoon ground nutmeg
- 1 tablespoon lemon juice
- 2 tablespoons unsalted butter, cut into small pieces
Let’s Bake! – Step-by-Step Instructions
Here’s how to create these delightful Apple Bars:
Preheat Your Oven & Prep the Pan: Preheat your oven to 350°F (175°C). Grease and flour a 9×13 inch baking pan. Alternatively, line it with parchment paper, leaving an overhang on the sides for easy removal. This step is key to prevent sticking!
Make the Shortbread Crust: In a large bowl, combine the flour, sugar, and salt. Add the cold, cubed butter.
- Pro Tip: Using a pastry blender or your fingertips, cut the butter into the flour mixture until it resembles coarse crumbs. You want visible pieces of butter still – that’s what creates the crumbly texture!
Press the First Crust Layer: Press about half of the crumb mixture evenly into the bottom of the prepared baking pan. Use the back of a spoon or your fingers to create a compact, even layer.
Bake the First Layer (Partially): Bake the crust for 10-12 minutes. It should be lightly golden. Let it cool slightly while you prepare the apple filling.
Prepare the Apple Filling: In a large bowl, combine the chopped apples, sugar, flour, cinnamon, and nutmeg. Stir gently to coat the apples evenly. Add the lemon juice and stir again.
Assemble the Bars: Pour the apple mixture evenly over the partially baked crust. Dot the top of the apples with the small pieces of butter.
Make the Second Crust Layer: Sprinkle the remaining crumb mixture evenly over the apple filling.
Bake to Perfection: Bake for 30-40 minutes, or until the topping is golden brown and the apples are tender. If the topping starts to brown too quickly, tent the pan loosely with aluminum foil during the last 10-15 minutes of baking.
Cool and Slice: Let the bars cool completely in the pan. This is crucial! If you cut them while they’re hot, they’ll be a crumbly mess. Once cooled, use a sharp knife to cut into squares.
Tips, Variations & Serving Suggestions
Tips for Success:
- Keep the Butter Cold: Cold butter is essential for a flaky, crumbly crust.
- Don’t Overmix the Filling: Gently toss the apples with the spices. Overmixing can make the filling mushy.
- Allow for Cooling Time: Patience is key! Let the bars cool completely before slicing to ensure clean cuts and prevent crumbling.
- Apple Selection: Use a mix of apple varieties for the best flavor and texture. Granny Smith adds tartness, while Honeycrisp adds sweetness and crispness.
Variations to Try:
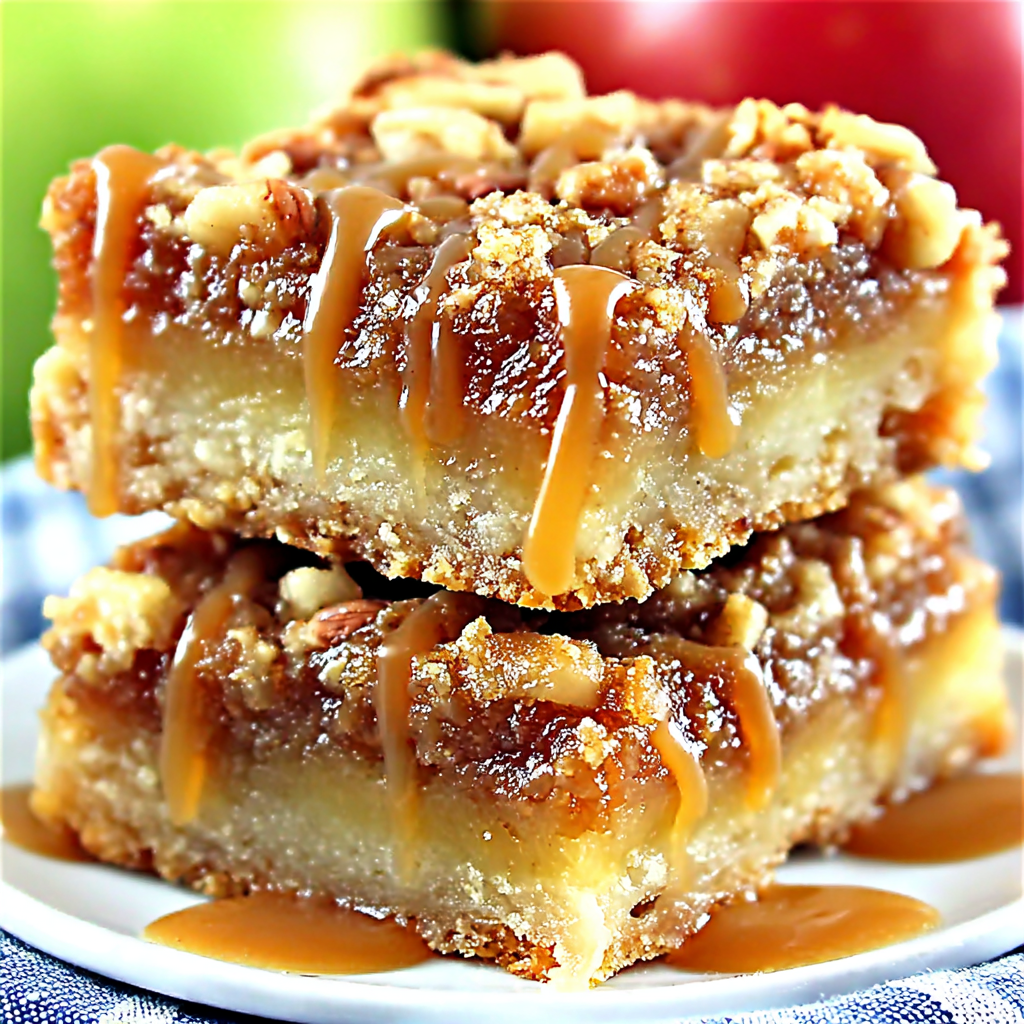
- Caramel Drizzle: Drizzle with caramel sauce after the bars have cooled.
- Pecan or Walnut Topping: Add ½ cup of chopped pecans or walnuts to the crumb topping for extra crunch.
- Spice it Up: Add a pinch of ground cloves or allspice to the apple filling for a warmer spice profile.
- Brown Sugar Version: Substitute brown sugar for granulated sugar in both the crust and the filling for a richer, molasses-like flavor.
- Apple Cider Glaze: Create a simple glaze by whisking together powdered sugar with a little apple cider. Drizzle over the cooled bars for extra sweetness and shine.
Serving Suggestions:
- Warm with Ice Cream: Serve warm with a scoop of vanilla ice cream for the ultimate indulgence.
- With a Cup of Coffee or Tea: These bars are the perfect accompaniment to a cozy beverage.
- As a Dessert at Brunch: They’re surprisingly great as a brunch treat too!
Nutritional Information (Approximate, per bar – will vary based on apple size and butter used)
- Calories: 350-400
- Fat: 20-25g
- Saturated Fat: 12-15g
- Carbohydrates: 40-45g
- Sugar: 25-30g
- Protein: 3-4g
(Disclaimer: These are estimates and should not be considered precise nutritional data.)
It’s time to channel your inner Elsie and create a batch (or two!) of these comforting Apple Bars. Don’t be intimidated by the baking process – it’s a lot easier than it looks. The reward of that warm, buttery, apple-filled goodness is more than worth the effort. So, grab your ingredients, preheat your oven, and get baking! You (and everyone you share them with) will be so glad you did. Happy baking!
