
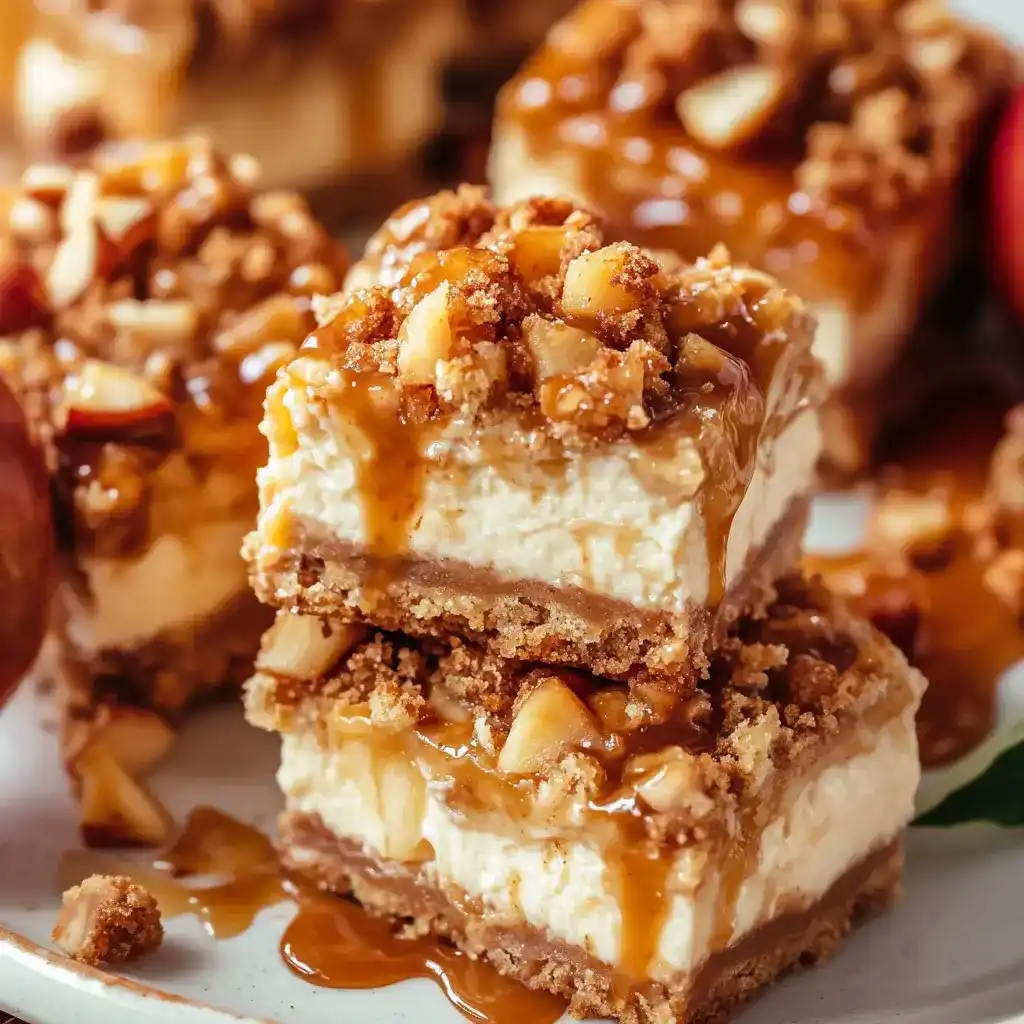
The smell of crisp apples and warm caramel always takes me back to childhood. My grandma used to make the best apple pie, but these Caramel Apple Cheesecake Bars Recipe are a close second! They’re easier to make, perfectly portioned, and pack an incredible punch of fall flavor. I’ve been tweaking this recipe for years, and I’m finally ready to share it with you. Get ready for a sweet, creamy, and utterly delicious treat!
Why You’ll Absolutely Love These Bars
These aren’t just any cheesecake bars. They’re a celebration of autumn. Here’s why you’ll be reaching for this recipe again and again:
- The Perfect Balance: The tangy cheesecake, sweet caramel, and tart apples create a symphony of flavors. It’s a complex but harmonious dessert.
- Easy to Make: Don’t let the multiple layers intimidate you. Each component is surprisingly simple to prepare.
- Crowd-Pleaser: These bars are always a hit at potlucks, bake sales, or just a cozy night in.
- Make-Ahead Friendly: You can make the crust and cheesecake layers a day in advance, making assembly even easier.
- That Caramel Layer! Let’s be honest, caramel makes everything better. And this homemade caramel takes it to the next level.
What You’ll Need: The Ingredient List
Okay, let’s gather our ingredients! I’ve broken them down by layer to keep things organized.
For the Graham Cracker Crust:
- 1 ½ cups graham cracker crumbs (about 10-12 full graham crackers)
- 5 tablespoons unsalted butter, melted
- ¼ cup granulated sugar
For the Cheesecake Filling:
- 16 ounces (2 packages) cream cheese, softened to room temperature
- ¾ cup granulated sugar
- 2 large eggs
- 1 teaspoon vanilla extract
- ¼ cup sour cream (full-fat is best!)
For the Apple Caramel Layer:
- 2 medium apples (Granny Smith, Honeycrisp, or a mix work great!), peeled, cored, and diced into ¼-inch pieces
- ¼ cup unsalted butter
- ½ cup packed light brown sugar
- ¼ cup heavy cream
- 1 teaspoon vanilla extract
- Pinch of salt
For the Caramel Drizzle (Optional but Highly Recommended):
- ½ cup granulated sugar
- 2 tablespoons unsalted butter
- ¼ cup heavy cream
- Pinch of salt
Let’s Get Baking: Step-by-Step Instructions
Now for the fun part! Follow these steps to create your amazing Caramel Apple Cheesecake Bars.
1. Make the Graham Cracker Crust:
- Preheat your oven to 350°F (175°C).
- In a medium bowl, combine the graham cracker crumbs, melted butter, and sugar.
- Press the mixture firmly into the bottom of an 8×8 inch square baking pan lined with parchment paper (leaving some overhang for easy removal).
- Bake for 8-10 minutes, or until lightly golden. Let cool slightly.
2. Prepare the Cheesecake Filling:
- In a large bowl, beat the softened cream cheese and sugar together until smooth and creamy. No lumps allowed!
- Beat in the eggs one at a time, mixing well after each addition. Don’t overmix!
- Stir in the vanilla extract and sour cream until just combined.
3. Craft the Apple Caramel Layer:
- In a medium saucepan, melt the butter over medium heat.
- Add the brown sugar and cook, stirring constantly, until the sugar is dissolved.
- Stir in the diced apples. Cook for about 5-7 minutes, or until the apples are slightly softened but still hold their shape.
- Pour in the heavy cream and vanilla extract. Cook for another 2-3 minutes, or until the sauce has thickened slightly. Add the pinch of salt.
4. Assemble and Bake:
- Pour the cheesecake filling evenly over the cooled graham cracker crust.
- Carefully spread the apple caramel mixture evenly over the cheesecake layer.
- Bake for 30-35 minutes, or until the cheesecake is set around the edges but still slightly jiggly in the center.
- Turn off the oven and let the bars cool in the oven with the door slightly ajar for 1 hour. This helps prevent cracking.
5. Make the Caramel Drizzle(Optional):
- While the bars are cooling, make the caramel drizzle. In a medium saucepan over medium heat, melt the sugar, stirring constantly until it liquifies and turns a golden amber color.
- Remove from heat and stir in butter until melted and smooth. Carefully pour in the heavy cream (it will bubble!) and stir.
*Add salt and stir until smooth. Let it cool slightly.
6. Chill and Serve:
- Refrigerate the bars for at least 4 hours, or preferably overnight, before cutting into squares.
- Drizzle with the optional caramel sauce before serving.
Tips, Variations, and Serving Ideas
Tips for Success:
- Room Temperature Cream Cheese is KEY: This ensures a smooth and creamy cheesecake.
- Don’t Overbake: Overbaking will result in a dry and cracked cheesecake. A little jiggle is good!
- Cooling is Crucial: The slow cooling process prevents cracking.
- Parchment Paper is Your Friend: Makes removing the bars a breeze!
Variations to Try:
- Apple Variety: Experiment with different apple varieties. Fuji or Gala would also be delicious.
- Spice it Up: Add a pinch of cinnamon, nutmeg, or apple pie spice to the apple caramel layer.
- Nutty Crunch: Sprinkle chopped pecans or walnuts over the caramel layer before baking.
- Salted Caramel: Add a generous pinch of flaky sea salt over the finished bars for a salted caramel experience.
- Individual Bars: Press the crust into muffin liners and bake as individual cheesecake bars.
Serving Suggestions:
- Serve chilled with a dollop of whipped cream.
- Pair with a warm cup of apple cider or coffee.
- Perfect for holiday gatherings or a simple dessert for any occasion.
Nutritional Information (Approximate, per bar)
- Calories: 450-500
- Fat: 25-30g
- Carbohydrates: 50-55g
- Protein: 5-7g
Please note: This is an estimate and can vary based on ingredient brands and portion sizes.
Ready to Celebrate Fall?
These Caramel Apple Cheesecake Bars Recipe are a guaranteed crowd-pleaser! They’re a delightful combination of textures and flavors that will transport you straight to an autumn orchard. Don’t be scared to give them a try – I promise they’re easier than they look. So, grab your ingredients, turn on some cozy music, and get baking! You won’t regret it. Happy baking!
