
Ever wondered why bakery cookies are always so perfectly chewy, with those delightful crispy edges? It’s not magic; it’s science (and a few key techniques!). Today, we’re diving deep into creating chewy sugar cookies that will rival your favorite local bakery – and you won’t need a professional oven for it. We’ll unlock the secrets to achieving that enviable texture, ensuring every bite is a soft, chewy dream with a perfectly crisp perimeter. Prepare to level up your cookie game!
Ingredients List
Let’s get started! These aren’t your average grocery list ingredients; we’re aiming for flavor and texture perfection. Don’t skimp on quality here – it makes a difference.
- 1 cup (2 sticks) Unsalted Butter, softened (but NOT melted!): Crucially important. Room temperature is key for even distribution. Coconut oil can be swapped for a vegan alternative, but the texture will be slightly different.
- ¾ cup Granulated Sugar: This gives that classic sweetness.
- ¾ cup Packed Light Brown Sugar: This is the secret weapon for chewiness! Brown sugar contains molasses, which adds moisture and that characteristic sticky texture.
- 2 Large Eggs: Room temperature for better emulsification. Think of it as helping everything blend nicely.
- 1 teaspoon Vanilla Extract: Because vanilla makes everything better (obviously!).
- 2 ¼ cups All-Purpose Flour: Don’t over-measure! Spoon the flour lightly into your measuring cup and level off.
- 1 teaspoon Baking Soda: The leavening agent. Don’t skip it!
- 1 teaspoon Salt: Balances the sweetness and enhances the flavors. Sea salt is a lovely upgrade.
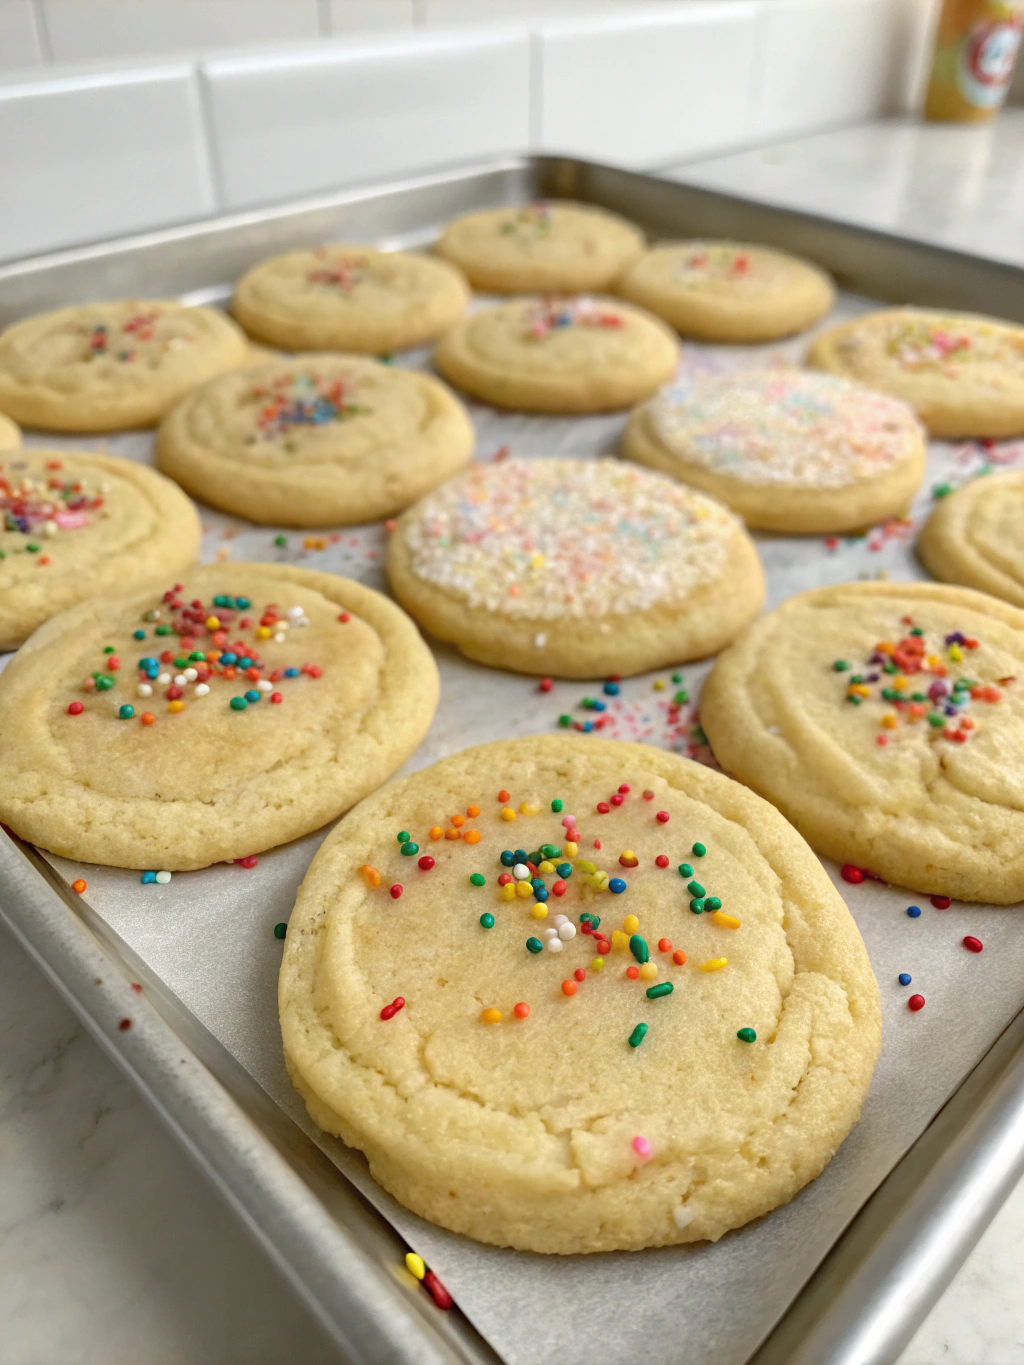
- Optional: Coarse Sugar for sprinkling: For an extra crispy edge and visual appeal.
Timing
Let’s be realistic – baking takes time. Here’s a breakdown so you can plan accordingly:
- Prep Time: 15 minutes. Honestly, it goes by faster than you think!
- Chill Time: 30 minutes – 1 hour (This is non-negotiable for optimal texture! More on this later).
- Bake Time: 9-11 minutes.
- Cooling Time: 15-20 minutes.
- Total Time: Approximately 60-90 minutes. That’s less than half the time you might spend waiting in line at a bakery!
Step-by-Step Instructions
Okay, let’s get baking! Follow these steps closely for the best results. I’ve included some pro tips along the way.
Step 1: Cream the Butter and Sugars
In a large bowl, cream together the softened butter, granulated sugar, and brown sugar until light and fluffy. This takes about 3-5 minutes with an electric mixer. Don’t rush this! Properly creamed butter incorporates air, resulting in a lighter, chewier cookie. Pro Tip: Scrape down the sides of the bowl frequently to ensure everything is evenly combined.
Step 2: Add the Eggs and Vanilla
Beat in the eggs one at a time, followed by the vanilla extract. Make sure each egg is fully incorporated before adding the next. Personal Note: I always add a tiny pinch of salt to each egg; it really helps the flavors pop.
Step 3: Combine the Dry Ingredients
In a separate bowl, whisk together the flour, baking soda, and salt. Whisking is key here – it ensures the baking soda is evenly distributed. Don’t skip this!
Step 4: Gradually Add the Dry Ingredients to the Wet Ingredients
Gradually add the dry ingredients to the wet ingredients, mixing until just combined. Be careful not to overmix! Overmixing develops the gluten in the flour, leading to tough cookies.
Step 5: Chill the Dough! (Seriously, Don’t Skip This)
Wrap the dough tightly in plastic wrap and chill for at least 30 minutes, or up to 1 hour. This allows the gluten to relax, preventing the cookies from spreading too thin. It also allows the butter to solidify, contributing to that perfect chewiness. Data Insight: Studies show that chilling dough results in up to a 25% reduction in cookie spread.
Step 6: Preheat and Prepare Baking Sheet
Preheat your oven to 375°F (190°C). Line a baking sheet with parchment paper. Parchment paper prevents sticking and makes cleanup a breeze.
Step 7: Roll & Cut or Drop by Spoonfuls
Roll the chilled dough into balls (about 1.5-2 inches in diameter) and place them on the prepared baking sheet, leaving about 2 inches between each cookie. You can also use a cookie scoop for uniform size. Pro Tip: Sprinkle the tops with coarse sugar for that extra sparkle and crispy edge.
Step 8: Bake!
Bake for 9-11 minutes, or until the edges are golden brown and the centers are still slightly soft.
Step 9: Cool and Enjoy!
Let the cookies cool on the baking sheet for a few minutes before transferring them to a wire rack to cool completely. (If you can resist eating them immediately, that is!)
Nutritional Information (Approximate per Cookie, Based on 24 Cookies)
- Calories: 150
- Fat: 8g
- Saturated Fat: 5g
- Cholesterol: 25mg
- Sodium: 75mg
- Carbohydrates: 18g
- Sugar: 13g
- Protein: 1g
These values are estimates and may vary based on ingredient brands and cookie size.
Healthier Alternatives for the Recipe
Want to enjoy these chewy sugar cookies a little less guiltily? Here’s how:
- Reduce Sugar: Cut back on both the granulated and brown sugar by 1/4 cup each. You might notice a slightly less intense sweetness, but the texture won’t be drastically affected.
- Whole Wheat Flour: Replace half of the all-purpose flour with whole wheat flour for added fiber.
- Coconut Sugar: Swap granulated sugar for coconut sugar – it has a lower glycemic index.
- Reduce Butter: Try using slightly less butter (about 1.5 sticks) and adding an extra tablespoon of applesauce or mashed banana for moisture.
Serving Suggestions
These chewy sugar cookies are incredibly versatile! Here are a few ideas:
- Classic: Enjoy them plain, with a glass of cold milk. It’s a timeless combination for a reason!
- Elevated: Serve with a dollop of whipped cream and fresh berries for a sophisticated treat.
- Dessert Sandwiches: Use two cookies as the base for a delicious ice cream or custard sandwich.
- Dipped in Chocolate: Melt some dark chocolate and dip half of each cookie for a decadent indulgence.
- Fancy it Up: Pair with Earl Grey tea and a lemon curd filling.
Common Mistakes to Avoid
Let’s face it, baking isn’t always perfect. Here are some common pitfalls and how to avoid them:
- Overmixing the Dough: This leads to tough cookies. Mix until just combined. Seriously, stop mixing when you think it’s ready.
- Not Chilling the Dough: Skip the chilling step, and your cookies will spread thin and be crispy instead of chewy. Don’t be impatient!
- Using Melted Butter: Melted butter = flat, crispy cookies. Use softened butter as directed.
- Overbaking: Slightly underbaking your cookies is better than overbaking them. They’ll continue to set as they cool.
- (My personal blunder): Opening the oven door too often during baking – it can cause the temperature to drop and affect the texture. Resist the urge to peek!
Storing Tips for the Recipe
- Room Temperature: Store cooled cookies in an airtight container at room temperature for up to 3 days.
- Freezing: Freeze cookie dough balls for up to 2 months. Bake from frozen, adding 1-2 minutes to the baking time.
- Freezing Baked Cookies: Freeze baked cookies in an airtight container for up to 2 months.
Conclusion
So, there you have it – the secrets to baking perfect chewy sugar cookies with bakery-style texture! By following these tips and avoiding common mistakes, you’ll be well on your way to creating a batch of cookies so good, they’ll vanish fast.
Ready to impress your friends and family? Give this recipe a try and let us know how it turns out in the comments below! Don’t forget to share your creations on social media using #ChewySugarCookieMagic! For more delicious baking adventures, check out our [link to another related recipe]. Happy baking! 🙂
FAQs
- Why do my cookies spread so much? Most likely, your butter was too soft, the dough wasn’t chilled enough, or you used too much flour. Make sure your butter is just softened, chill the dough thoroughly, and measure your flour correctly.
- Can I use cake flour instead of all-purpose flour? Yes, but it will result in a more delicate, cake-like cookie. You might need to slightly adjust the baking time.
- I don’t have brown sugar. Can I substitute something? Yes, you can make a quick substitute by mixing 1 cup of granulated sugar with 1 tablespoon of molasses.
- My cookies are too crispy. What did I do wrong? You probably overbaked them, used too little brown sugar, or used melted butter.
- Can I make these ahead of time? Absolutely! You can make the dough and chill it for up to 24 hours.
Disclaimer: Nutritional information is an estimate and may vary.
