
Ever wondered if you could satisfy your cravings for both a decadent cheesecake and a chewy, buttery sugar cookie at the same time? Spoiler alert: you absolutely can! And prepare to have your dessert world rocked because this Creamy Sugar Cookie Cheesecake isn’t just possible, it’s utterly delicious. I’ve been experimenting with dessert mashups for years, and this one consistently wins the popularity contest (among my friends and family, at least!). This recipe combines the tanginess of classic cheesecake with the nostalgic sweetness of a sugar cookie, creating a textural and flavor sensation that’s worth every single bite. Let’s dive in!
Ingredients List
Okay, let’s gather our troops! Here’s what you’ll need to build this masterpiece:
For the Sugar Cookie Crust:
- 1 ½ cups all-purpose flour – for that classic sugar cookie texture.
- ½ teaspoon baking powder– helps things rise just a touch.
- ¼ teaspoon salt – balances the sweetness.
- ½ cup (1 stick) unsalted butter, softened – Gotta have that buttery goodness.
- ¾ cup granulated sugar – Sweetness is key!
- 1 large egg – binds everything together.
- 1 teaspoon vanilla extract – adds that warm, comforting flavor.
For the Creamy Cheesecake Filling:
- 24 ounces cream cheese, softened – Full-fat is best here, trust me.
- 1 cup granulated sugar – More sweetness! (Yes, please.)
- ¼ cup sour cream – Adds tang and creaminess.
- 2 large eggs – Gives the cheesecake structure.
- 1 teaspoon vanilla extract – Because vanilla makes everything better.
- Optional: ¼ cup crushed sugar cookies (for extra cookie flavor!)
Timing
Let’s be realistic, dessert perfection takes a little time. Here’s the breakdown:
- Prep Time: 20 minutes – Not too shabby!
- Bake Time: 55-65 minutes – Keep an eye on it!
- Cooling Time (minimum): 4 hours (or preferably overnight) – Patience is a virtue, especially with cheesecake!
- Total Time: Approximately 5 hours. That’s less time than binge-watching a whole season of your favorite show (IMO).
Step-by-Step Instructions
Alright, let’s get baking!
1. Make the Sugar Cookie Crust
Preheat your oven to 350°F (175°C). In a large bowl, whisk together the flour, baking powder, and salt. Add the softened butter and sugar, and beat with an electric mixer until crumbly. Beat in the egg and vanilla extract until just combined. Press the mixture evenly into the bottom of a 9-inch springform pan. For an even more impressive crust, use a cookie cutter to shape the edges! Bake for 12-15 minutes, or until lightly golden. Let it cool while you prepare the filling.
2. Prepare the Creamy Cheesecake Filling
In a large bowl, beat the softened cream cheese with an electric mixer until smooth and creamy. Gradually add the sugar, beating until well combined. Mix in the sour cream and vanilla extract. Beat in the eggs one at a time, mixing just until combined. Don’t overmix! Overmixing incorporates too much air and can lead to cracks in your cheesecake.
Pro Tip: If you’re feeling fancy, gently fold in the crushed sugar cookies – it adds an extra layer of deliciousness.
3. Assemble and Bake the Cheesecake
Pour the cheesecake filling over the cooled sugar cookie crust. Gently tap the springform pan on the counter a few times to release any air bubbles. Bake for 55-65 minutes, or until the edges are set, but the center still has a slight jiggle.
Don’t open the oven door during baking! This is crucial for preventing cracks in the cheesecake.
4. Cool and Chill
Turn off the oven and crack the oven door open slightly. Let the cheesecake cool in the oven for 1 hour. This slow cooling process helps prevent cracking. After 1 hour, remove the cheesecake from the oven and let it cool completely at room temperature. Then, cover the cheesecake with plastic wrap and refrigerate for at least 4 hours, or preferably overnight, to allow the flavors to meld and the cheesecake to set completely.
Nutritional Information (per slice – assuming 10 slices)
Alright, let’s get real… we’re eating cheesecake! But just for those of you who are calorie-conscious (or just curious!), here’s an approximate breakdown:
- Calories: 450-500
- Fat: 30-35g
- Saturated Fat: 18-22g
- Cholesterol: 80-90mg
- Sodium: 200-250mg
- Carbohydrates: 45-50g
- Sugar: 30-35g
- Protein: 5-7g
Note: This is an estimate and can vary depending on ingredient brands and slice size. Don’t stress too much – just enjoy!
Healthier Alternatives for the Recipe
Want to lighten things up a bit? No problem! Here are a few ideas:
- Reduced-Fat Cream Cheese: Though I swear by full-fat for maximum creaminess, you could use reduced-fat. Just be aware the texture might be slightly less silky.
- Sugar Substitute: Experiment with your favorite sugar substitute in both the crust and the filling.
- Whole Wheat Flour: Use half whole wheat flour for a little extra fiber in the crust.
- Greek Yogurt: Replace the sour cream with plain Greek yogurt for a tangier and slightly healthier twist.
Serving Suggestions
This Creamy Sugar Cookie Cheesecake is already pretty fantastic on its own, but here are a few ways to elevate it:
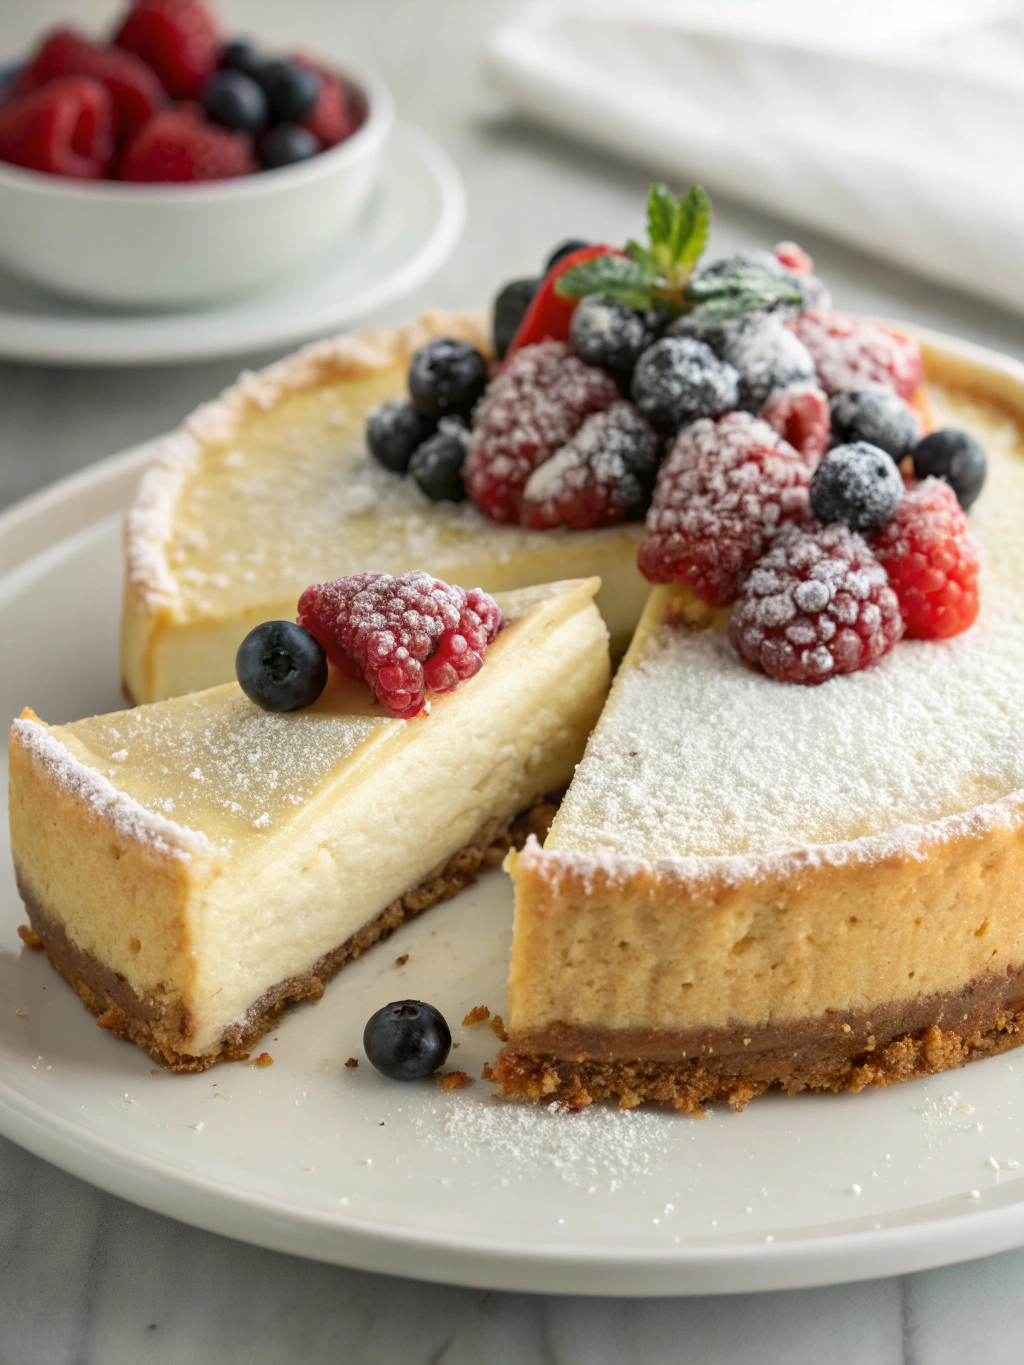
- Fresh Berries: A classic pairing! The vibrant color and tartness of berries complement the richness of the cheesecake beautifully.
- Chocolate Ganache: Drizzle with a rich, dark chocolate ganache for an extra dose of indulgence.
- Caramel Sauce: Salty caramel sauce is a match made in heaven.
- Whipped Cream & Sprinkles: Because, why not? Add a dollop of freshly whipped cream and a sprinkle of your favorite toppings for a festive touch.
Common Mistakes to Avoid
Let’s nip these in the bud before they ruin your cheesecake dreams:
- Using Room Temperature Ingredients: This is critical. Cold cream cheese will result in a lumpy, uneven filling.
- Overmixing the Batter: Overmixing incorporates too much air, leading to cracks. Mix just until combined.
- Opening the Oven Door During Baking: Seriously, resist the urge! Temperature fluctuations cause cheesecake cracks.
- Not Cooling Slowly: As mentioned above, a slow cooling process is key to preventing cracks.
- Rushing the Chilling Time: Be patient! Chilling allows the cheesecake to set completely and the flavors to develop.
Storing Tips for the Recipe
- Refrigeration: Store leftover cheesecake, tightly covered, in the refrigerator for up to 3-4 days.
- Freezing: For longer storage, wrap the cheesecake in plastic wrap and then aluminum foil and freeze for up to 2 months. Thaw overnight in the refrigerator before serving.
- Prep Ahead: You can make the sugar cookie crust 1-2 days in advance and store it in an airtight container.
Conclusion
See? That wasn’t so hard, was it? This Creamy Sugar Cookie Cheesecake is a showstopper that’s surprisingly simple to make. The combination of buttery sugar cookie crust and decadent cheesecake filling will have everyone begging for more. So, go ahead, give it a try – you won’t regret it!
Now, tell me in the comments – are you a cheesecake fanatic or a sugar cookie lover? And more importantly – What are your favourite dessert mashups? I’m always looking for my next baking adventure! Also, don’t forget to share pictures of your creations on social media using #CreamySugarCookieCheesecake – I can’t wait to see them! If you enjoyed this recipe, check out our other dessert delights [link to related recipes]. Happy baking! : )
FAQs
- Can I use a different type of crust? Absolutely! Graham cracker crust would also work well, though it’ll change the flavor profile.
- My cheesecake cracked! What happened? Most likely, it was due to temperature fluctuations. Try to avoid opening the oven door during baking and cool the cheesecake slowly as described above. Don’t worry – it will still taste delicious!
- I don’t have a springform pan. Can I use a regular cake pan? While a springform pan makes removal easier, you can use a regular cake pan. Just line the bottom with parchment paper for easy removal.
- Can I make this gluten-free? Yes! Substitute gluten-free flour in the crust and ensure your vanilla extract is gluten-free.
