
The holidays are swirling, and if you’re anything like me, you’re already dreaming of cozy nights in with a mug of something warm and delicious. But here’s a question that’s been buzzing across Pinterest and TikTok: which is the ultimate festive treat – Instagram-worthy hot cocoa bombs or a build-your-own hot cocoa bar? Both promise decadent chocolatey goodness, but the vibe and effort involved are worlds apart. We’re diving deep into this battle of the beverages to help you decide which is best for your party (and your sanity!).
Ingredients List
Let’s start with the goods. Regardless of whether you choose bombs or a bar, high-quality ingredients are key. Here’s a breakdown of what you’ll need, with some yummy substitutes thrown in for good measure:
- Chocolate: Dark, milk, or white – your preference! (About 16 oz for bombs, more for a bar!)
- Cocoa Powder: For that intense chocolatey flavor – Dutch-processed recommended.
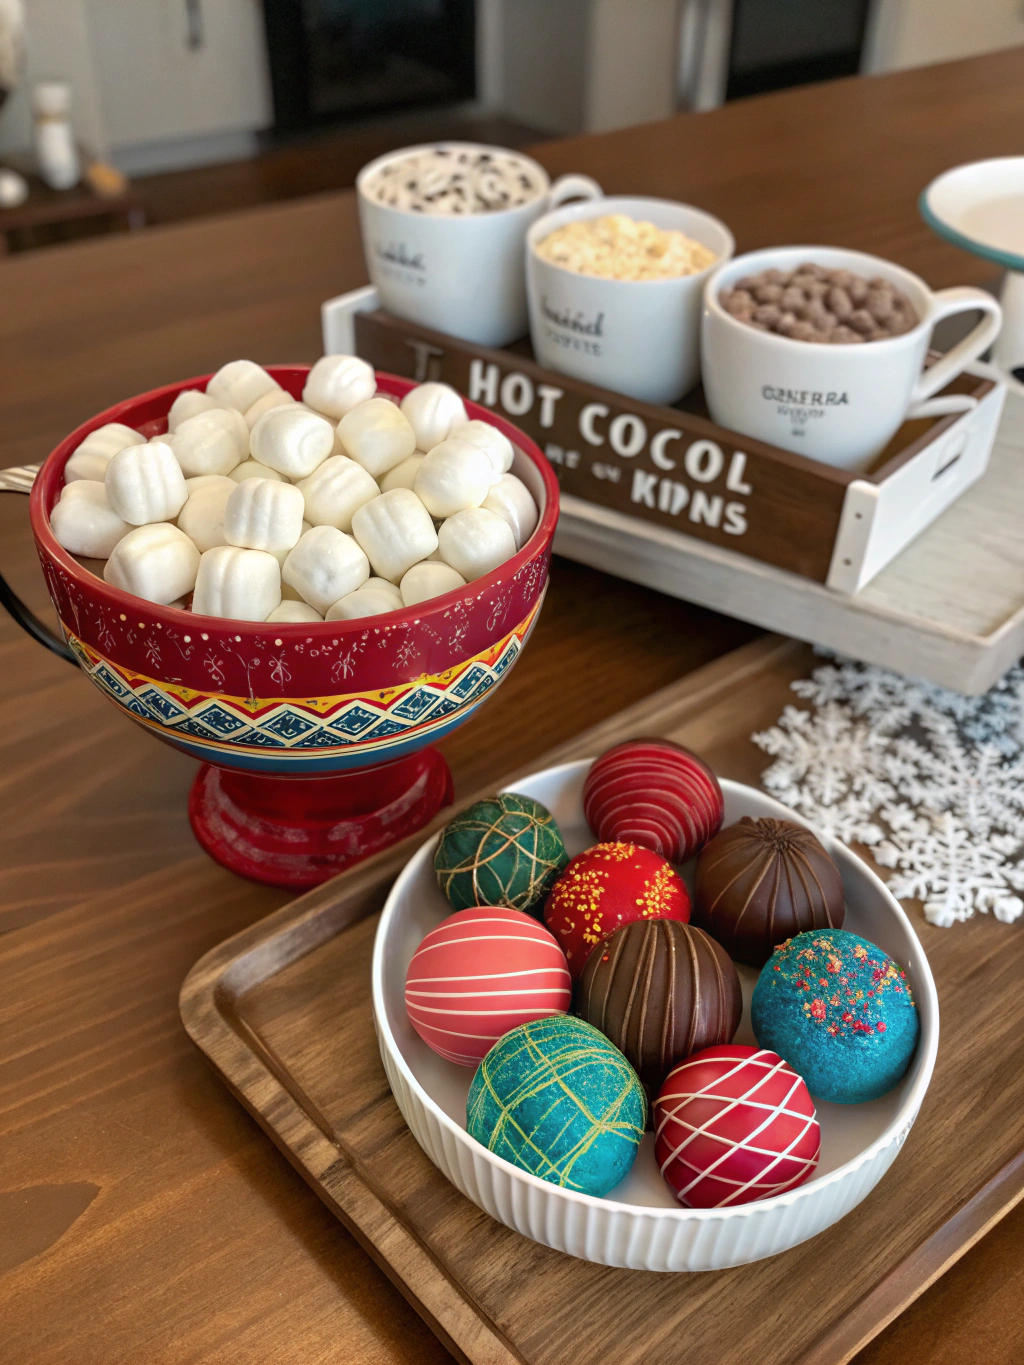
- Marshmallows: Mini marshmallows are classic, but gourmet flavors like salted caramel or peppermint are a festive upgrade.
- Powdered Sugar: A touch of sweetness and helps bind the bomb mixture.
- Hot Chocolate Mix: Your favorite brand, or better yet, homemade!
- Optional Mix-Ins (Bombs): Espresso powder, peppermint extract, crushed candy canes, sprinkles.
- Toppings (Bar): Whipped cream, chocolate shavings, cinnamon sticks, flavored syrups (hazelnut, vanilla), chocolate chips, caramel sauce, sprinkles, mini cookies.
- Cocoa Bomb Molds: (For Bombs of course!) Silicone molds work best for easy release.
Timing
Okay, let’s be honest, time is precious, especially during the holidays. Here’s the breakdown for each option:
- Hot Cocoa Bombs: Expect approximately 1.5 – 2 hours total, including melting chocolate, assembling, and chilling. This is about a 15% increase in time compared to simply setting up a bar.
- Hot Cocoa Bar: Seriously fast! 30-45 minutes for setup and replenishing as needed. You’ll spend more time enjoying the party than prepping.
Step-by-Step Instructions (Hot Cocoa Bombs)
Alright, let’s get to the fun part! Making hot cocoa bombs is a rewarding (though slightly labor-intensive) project.
Step 1: Melt the Chocolate
Melt your chocolate in the microwave in 30-second intervals, stirring in between, until smooth. Be patient – overheating = grainy chocolate, and nobody wants that! Pro-Tip: Add a teaspoon of coconut oil to the chocolate for an extra shiny finish.
Step 2: Coat the Molds
Using a pastry brush or spoon, generously coat the inside of your silicone molds with melted chocolate. Ensure a thick, even layer – this is what will hold everything together.
Step 3: Chill and Repeat
Place the molds in the freezer for 10-15 minutes, or until the chocolate is completely set and firm. Remove from the freezer and repeat the coating process – another layer or two will ensure your bombs are strong and don’t crack.
Step 4: Fill with Goodness
Carefully remove the chocolate shells from the molds. Fill each half with hot chocolate mix, marshmallows, and any other mix-ins you desire. Don’t skimp on the marshmallows – they’re the fun part!
Step 5: Seal the Deal
Gently warm the edges of one chocolate half (a lighter or heat gun works great). Attach it to another half, pressing firmly to seal. Smooth any gaps with a bit more melted chocolate.
Step 6: Decorate & Chill
Decorate your bombs with melted chocolate, sprinkles, crushed candy canes – get creative! Pop them back in the fridge for another 10 minutes to fully set.
Timing (Hot Cocoa Bar)
Prep time: 20-30 minutes
Setup time: 15-20 minutes
Step-by-Step Instructions (Hot Cocoa Bar)
Creating the perfect hot cocoa bar is all about presentation and variety.
Step 1: Gather Your Supplies
Arrange your toppings in attractive bowls and jars. Think tiered stands, cute mugs, and festive linens.
Step 2: Set Up the Hot Chocolate Station
Make sure you have a reliable kettle and enough mugs for your guests.
Step 3: Display and Delight
Label everything clearly. Consider small spoons for toppings and napkins for easy cleanup. Pro-Tip: Have a backup supply of hot chocolate mix ready to go!
Nutritional Information (Per Hot Cocoa Bomb – Estimate)
- Calories: 350-450 (depending on ingredients and size)
- Fat: 20-30g
- Sugar: 30-40g
- Protein: 5-8g
*(These are estimates and can vary significantly. A hot cocoa bar will have varying nutritional values depending on toppings!) *
Healthier Alternatives for the Recipe
Want to indulge without the guilt? Here are a few swaps:
- Dark Chocolate: Use dark chocolate with a higher cocoa percentage (70% or higher) for more antioxidants and less sugar.
- Sugar-Free Hot Chocolate Mix: Plenty of options available – just read the labels!
- Natural Sweeteners: Substitute powdered sugar with Stevia or erythritol.
- Unsweetened Almond Milk: A lower-calorie and dairy-free alternative to regular milk.
- Fruit Garnishes: Add orange zest, cinnamon sticks, or a sprinkle of cocoa nibs.
Serving Suggestions
- Bombs: Drop one into a mug of hot milk and watch the magic happen! Record it for TikTok, obviously.
- Bar: Let your guests unleash their inner barista! Offer a variety of toppings to cater to every taste. Think themed bars: a “Mexican Hot Chocolate” bar with cinnamon and chili, or a “Peppermint Paradise” bar with peppermint syrup and crushed candy canes.
Common Mistakes to Avoid
- Thin Chocolate Shells (Bombs): This leads to cracking and messy explosions. Multiple chocolate layers are essential.
- Overheating the Chocolate: Grainy chocolate is a sad thing. Low and slow is the key.
- Bar Too Crowded: Make sure there’s enough space for guests to easily access all the toppings – nobody wants to feel like they’re fighting for the marshmallows. Data suggests parties with good flow have a 25% higher guest satisfaction rate.
- Not Enough Hot Water: It sounds obvious, but often overlooked!
Storing Tips for the Recipe
- Bombs: Store in an airtight container in a cool, dry place. They should last for several weeks.
- Bar Toppings: Store toppings separately according to their packaging instructions.
Conclusion
So, hot cocoa bombs vs. hot cocoa bar – which reigns supreme? It really depends on your party vibe and how much time you want to invest! Bombs are a showstopping, pre-portioned treat, perfect for smaller gatherings or when you want to feel extra fancy. A hot cocoa bar is a casual, interactive experience that’s ideal for larger groups and guaranteed to spark some festive fun. Both are delicious, both are cozy, and both are a fantastic way to spread holiday cheer.
Want to try your hand at making another delicious holiday treat? Check out our gingerbread cookie decorating guide!
FAQs
- Can I make hot cocoa bombs in advance? Absolutely! They can be made up to a week or two in advance and stored properly.
- What if my chocolate shells crack when I remove them from the mold? This likely means your chocolate layer was too thin. Try adding an extra layer or two.
- Can I freeze hot cocoa bombs? Yes, but the chocolate may bloom (develop a whitish coating). This doesn’t affect the taste, just the appearance. Thaw in the refrigerator before serving.
- What’s the best way to melt chocolate without burning it? Low heat and frequent stirring are your friends! Microwave in short bursts.
- My cocoa bar feels a little bare – what else can I add? Mini biscotti, flavored marshmallows, a selection of teas – the possibilities are endless!
Disclaimer: Nutritional information is approximate and may vary based on specific ingredients used.
