
The first time I tasted katsu was during a rainy afternoon in Tokyo. I ducked into a small family-run restaurant to escape the downpour, and what followed was culinary magic. The crispy panko-coated cutlet, the sweet-savory sauce, and the perfectly steamed rice created a harmony of flavors I’d never experienced before. Japanese Katsu Bowls have since become my comfort food, my celebration dish, and my go-to recipe when I want to impress dinner guests without spending hours in the kitchen.
Today, I’m sharing my authentic recipe for Japanese Katsu Bowls that brings those Tokyo flavors right to your dining table. This dish combines the satisfying crunch of panko-breaded meat with steaming rice and a tangy sauce that will transport you straight to Japan with each bite.
Why You’ll Love These Japanese Katsu Bowls
There’s something undeniably satisfying about a well-made katsu bowl. The contrast between the crispy exterior and tender meat inside creates a texture paradise. The sweet-savory katsu sauce adds depth, while fresh vegetables bring balance.
But beyond the incredible taste, you’ll love how:
- It’s easier to make than it looks, perfect for impressing guests
- The ingredients are readily available in most grocery stores
- You can customize it based on your preferences (chicken, pork, or even vegetarian options)
- It stores well for next-day lunches
- The entire family will enjoy it, even picky eaters
- You’ll master an authentic Japanese cooking technique
Ingredients for Perfect Japanese Katsu Bowls
For the Katsu:
- 4 boneless pork loin chops (about 6 oz each) or chicken breasts
- Salt and freshly ground black pepper
- ½ cup all-purpose flour
- 2 large eggs, beaten
- 2 cups panko breadcrumbs
- Vegetable oil for frying (about 2 cups)
For the Katsu Sauce:
- ⅓ cup ketchup
- 2 tablespoons Worcestershire sauce
- 2 tablespoons soy sauce
- 2 tablespoons mirin (Japanese sweet rice wine)
- 1 tablespoon sugar
- 1 teaspoon Dijon mustard
- ¼ teaspoon garlic powder
For Serving:
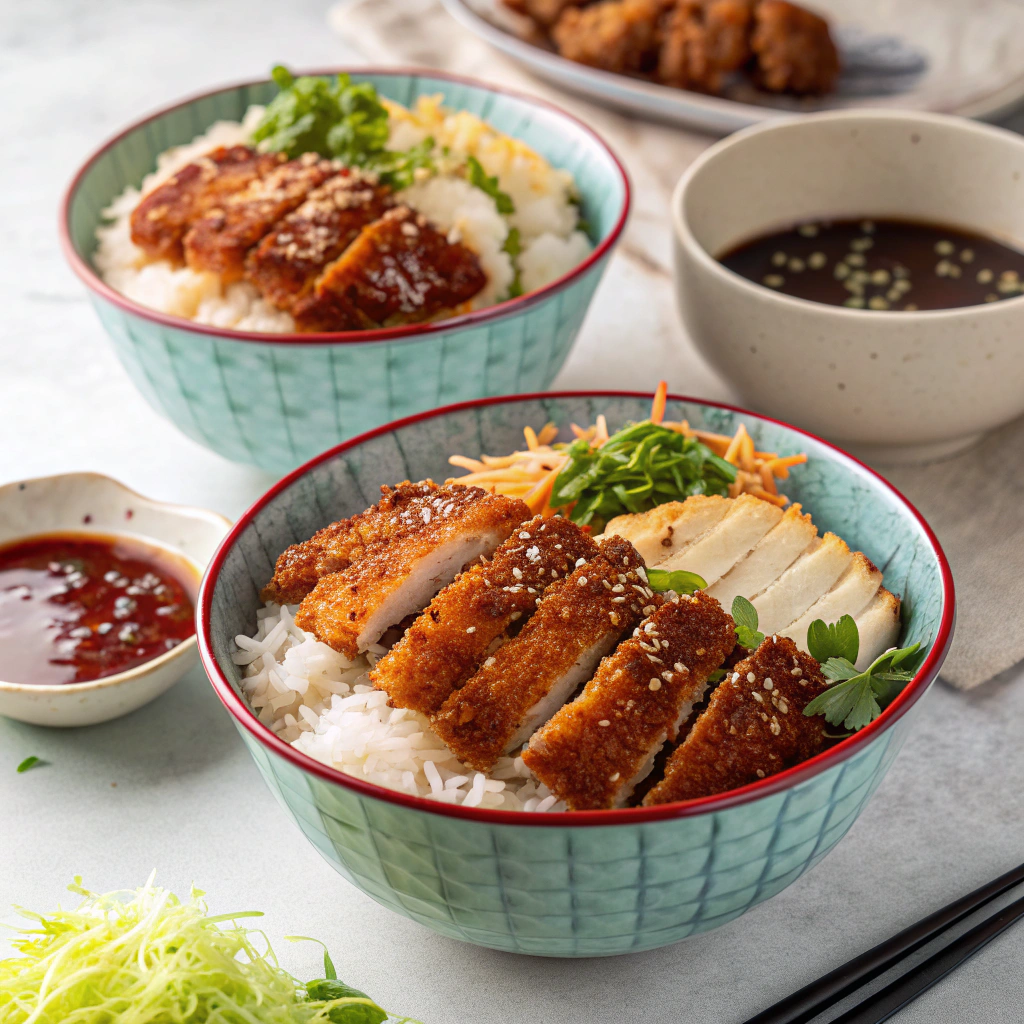
- 4 cups cooked Japanese short-grain rice
- 2 cups shredded cabbage
- 1 cup thinly sliced cucumber
- ¼ cup pickled ginger (optional)
- 2 green onions, thinly sliced
- 1 tablespoon toasted sesame seeds
- Lemon wedges for serving
How to Make Perfect Japanese Katsu Bowls
Preparing the Meat
- If using pork, place each cutlet between two sheets of plastic wrap and pound to about ½-inch thickness using a meat mallet. For chicken, slice horizontally to create thinner cutlets.
- Season both sides generously with salt and pepper.
- Set up your breading station: place flour in one shallow dish, beaten eggs in another, and panko breadcrumbs in a third.
- Dredge each piece of meat in flour, shaking off excess.
- Dip into beaten eggs, ensuring complete coverage.
- Press firmly into panko breadcrumbs, making sure the entire surface is coated evenly.
- Place breaded cutlets on a wire rack and let rest for 5 minutes (this helps the coating adhere better).
Frying the Katsu
- Heat oil in a large, heavy-bottomed skillet over medium-high heat to 350°F (175°C). The oil should be about ½-inch deep.
- Test the oil by dropping in a few panko crumbs – they should sizzle immediately but not burn.
- Carefully place 1-2 cutlets in the hot oil (don’t overcrowd).
- Fry for 3-4 minutes per side until golden brown and crispy. Chicken may require slightly longer cooking time (internal temperature should reach 165°F).
- Transfer to a wire rack placed over paper towels to drain excess oil.
- Let rest for 5 minutes before slicing.
Making the Katsu Sauce
- While the meat is resting, combine all sauce ingredients in a small saucepan.
- Simmer over medium-low heat for 5 minutes, stirring occasionally.
- Remove from heat and let cool slightly – the sauce will thicken as it cools.
Assembling Your Japanese Katsu Bowls
- Place a generous portion of warm rice in each bowl.
- Slice the katsu into ½-inch strips against the grain.
- Arrange the sliced katsu over the rice.
- Place a handful of shredded cabbage and cucumber slices alongside.
- Drizzle katsu sauce over the meat (or serve on the side for dipping).
- Garnish with green onions, sesame seeds, and pickled ginger if using.
- Serve with lemon wedges on the side.
Pro Tips for Perfect Katsu Every Time
The Secret to Extra-Crispy Katsu
Double-dip your cutlets for maximum crunchiness: after the initial breading, dip back into the egg mixture and then into the panko again. This creates an irresistibly thick and crunchy coating.
Temperature Matters
Keep your oil at a consistent temperature between 340-350°F (170-175°C). Too hot, and the panko will burn before the meat cooks; too cool, and your katsu will absorb excess oil and become greasy.
Don’t Skip the Rest
Letting the breaded cutlets rest before frying and again after frying makes a significant difference in texture and juiciness.
Delicious Variations to Try
Chicken Katsu
Substitute chicken breasts for pork. They fry beautifully and offer a leaner option.
Katsudon
Transform leftovers into Katsudon by simmering sliced katsu with beaten eggs, onions, and a sweet-savory sauce, then serving over rice.
Curry Katsu
Serve your katsu with Japanese curry instead of traditional katsu sauce for a heartier meal.
Tonkatsu Sandwich (Katsu Sando)
Place katsu between soft milk bread with katsu sauce and cabbage for a Japanese-style sandwich that’s perfect for lunch.
Nutritional Information (Per Serving)
- Calories: Approximately 720
- Protein: 38g
- Carbohydrates: 74g
- Fat: 28g
- Fiber: 5g
- Sodium: 890mg
Note: Nutritional values vary based on specific ingredients and portion sizes.
Make Japanese Katsu Bowls Your New Comfort Food
There’s something magical about cutting into a perfectly fried katsu cutlet – the satisfying crunch, the tender meat inside, and the way the sauce complements every bite. It’s no wonder this dish has become a global favorite.
Don’t be intimidated by the multiple steps – once you’ve made katsu bowls a few times, you’ll find yourself whipping them up without even checking the recipe. It’s the perfect way to bring authentic Japanese flavors into your kitchen without needing specialized ingredients or equipment.
So gather your ingredients, heat up that oil, and prepare for your home to be filled with the irresistible aroma of freshly fried katsu. From my kitchen to yours – itadakimasu! (Let’s eat!)
